A NEW WATER PUMP FOR THE 67 DEVILLE AND DETAILING THE ENGINE
So I ordered a new, high quality rebuilt water pump from one of my favorite sources. When I got it, I found out that it was one for a 64/65 Cadillac with an additional water outlet. This seems to be the type everybody is selling nowadays and it is much more common. It will fit the 1967 429 engine and it even has the additional water outlet pre-plugged with a rubber plug. The problem I had with it, is that it looks completely incorrect on the 1967 Cadillac, and so it was not acceptable for me.
I then found a very good source for Cadillac parts. They are priced higher than other outlets (if you can even find this parts anywhere else..), but David - the owner - offers only 100% correct and high quality parts. He also has a huge collection of NOS parts. I found some parts through him that I did not find anywhere else. His customer service is excellent as well - I can highly recommend him.
Until around 2009 I had most work on my cars performed by a restoration shop specialized in American Cars. Then I decided to no longer go there for a lot of reasons. With the growing numbers of cars I collected, I could no longer afford to pay somebody to have all the work done, and I no longer accepted to pay good money for lousy work and bear the shop owners terrible attitude against his clients.
Now that I´m trying to do everything by myself, I found a lot of bad work the professionals did, and sometimes I´m really shocked to see what I wasted my money for, but I had no idea about cars and they could have told me everything and I would have believed them…. Lots of work they did leaves a lot to be desired, and you can see some examples in the pictures below…
When they repainted parts of my 67 Deville´s engine, they used the completely incorrect Cadillac blue, which was used from 1977 on. I always hated it, and now that I had to disassemble so much to replace the water pump they did in 2001, I decided to paint everything correctly.
I detailed all the parts I took off and had them media blasted. After they were cleaned, I painted them with the correct shade of Cadillac Blue. Bill Hirsch engine enamel is the best and most correct engine enamel for Cadillacs. You can see lots of pictures below which document what I did. Besides the incorrect paint I found out that fuel lines were damaged, bolts were missing or broken off and many other small flaws which I corrected now.
I´m now waiting for the correct upper and lower radiator hoses to arrive, which are reproduced by Fusick, to replace the still original hoses from 1967! The originals still look great and would probably last for a long time, but I do not want to take any chances… I am now hoping that nothing is leaking and that I wont have to re-do any of the work.
When I took the radiator out, the overflow tube came loose. I already had the same problem years ago, and it was not fixed properly by the restoration shop… Luckily I found an old gentleman locally, who could brace it back together the old school way. I will of course detail the radiator as well before installing it back into the car.
This is a short video which shows the problem I had with the water pump and the bad bearing. You can clearly see the wobbling of the shaft and hear the shot bearing.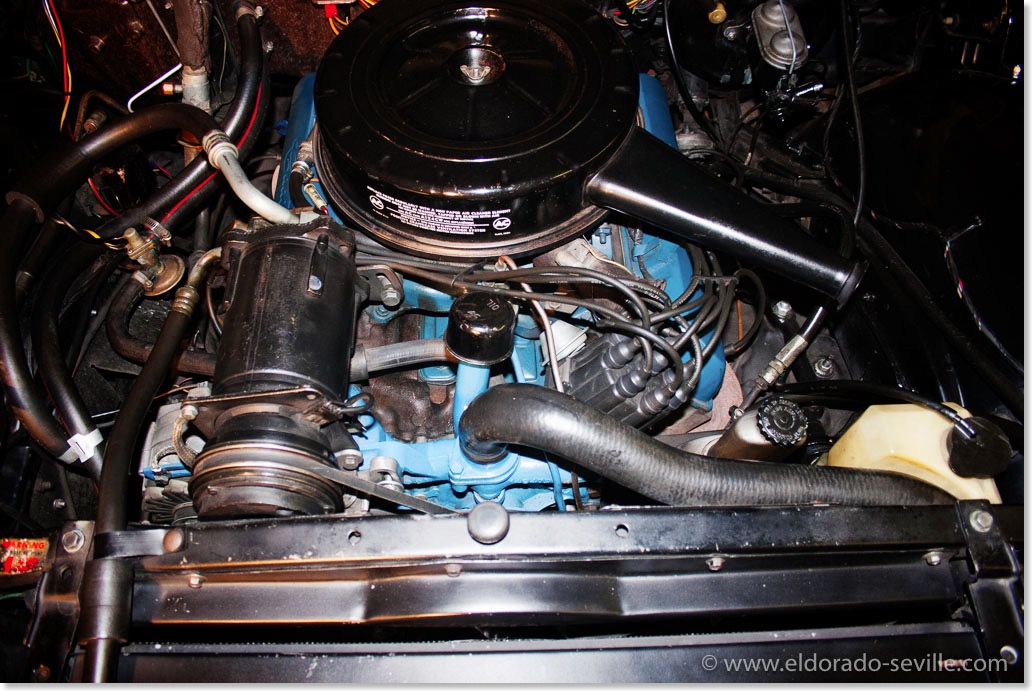
This is how the engine bay looked like before, with everything painted in the incorrect later Cadilllac Blue...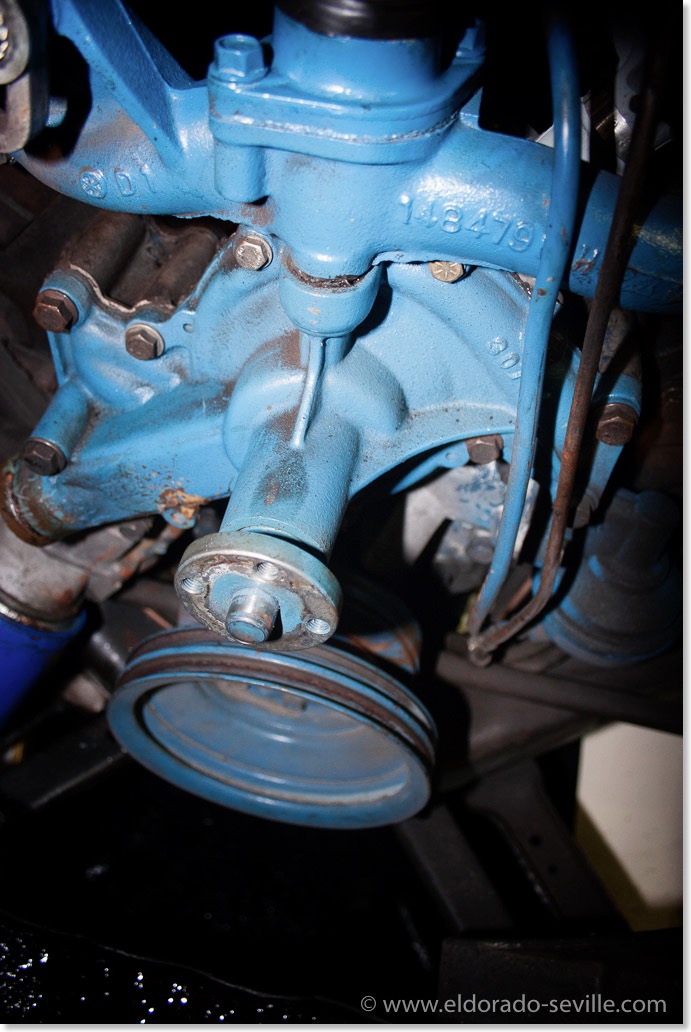
The defective water pump is about to come out. I will also replace the painted fuel line with a correct one from a spare engine I have. The water pump made a loud bearing noise and the shaft was a little loose.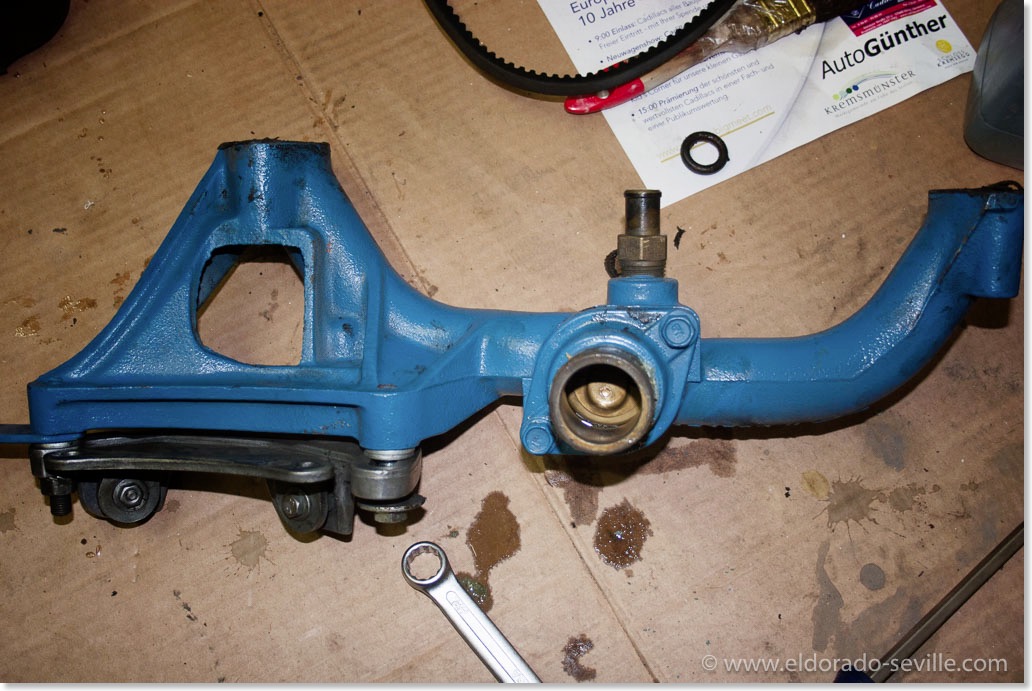
I will sandblast and repaint the hot water crossover passage.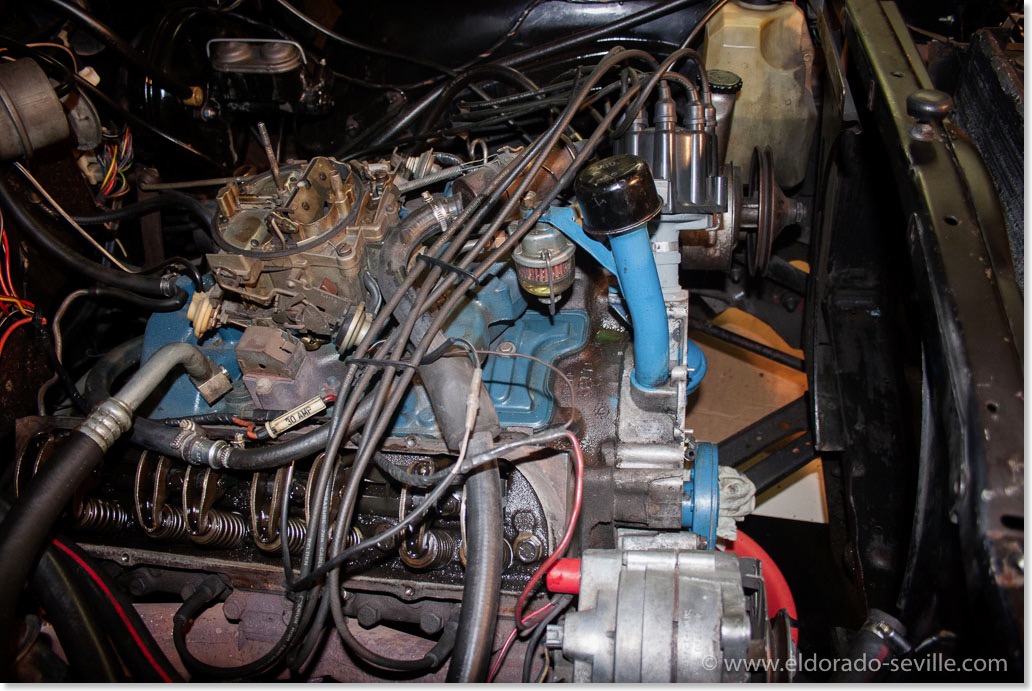
Water pump, radiator and valve covers removed.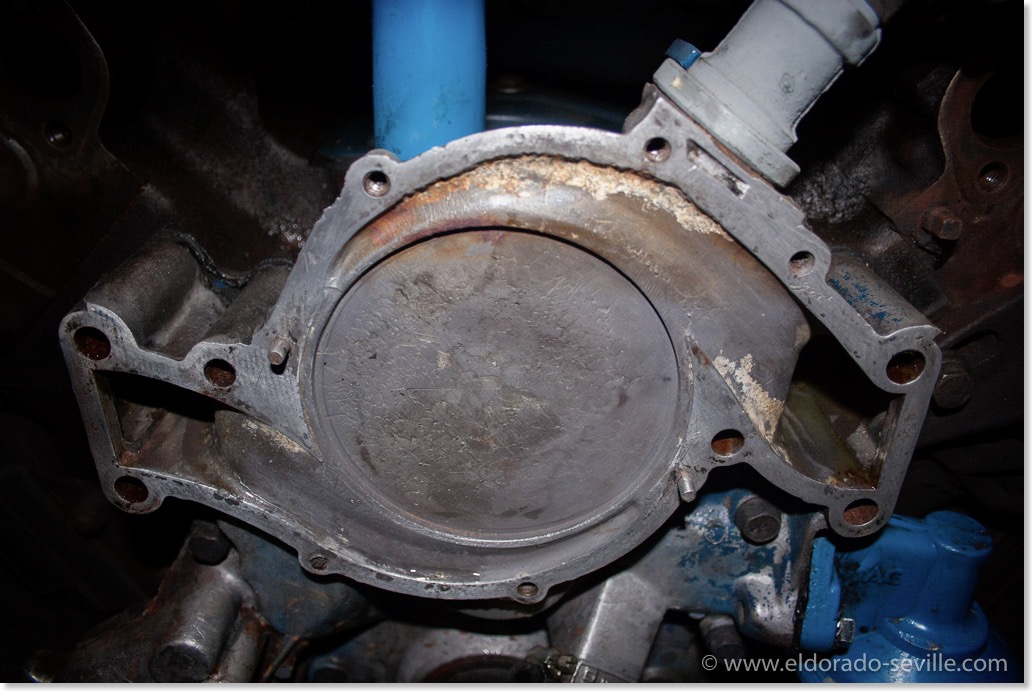
The water pump was removed - the front cover looks pretty good.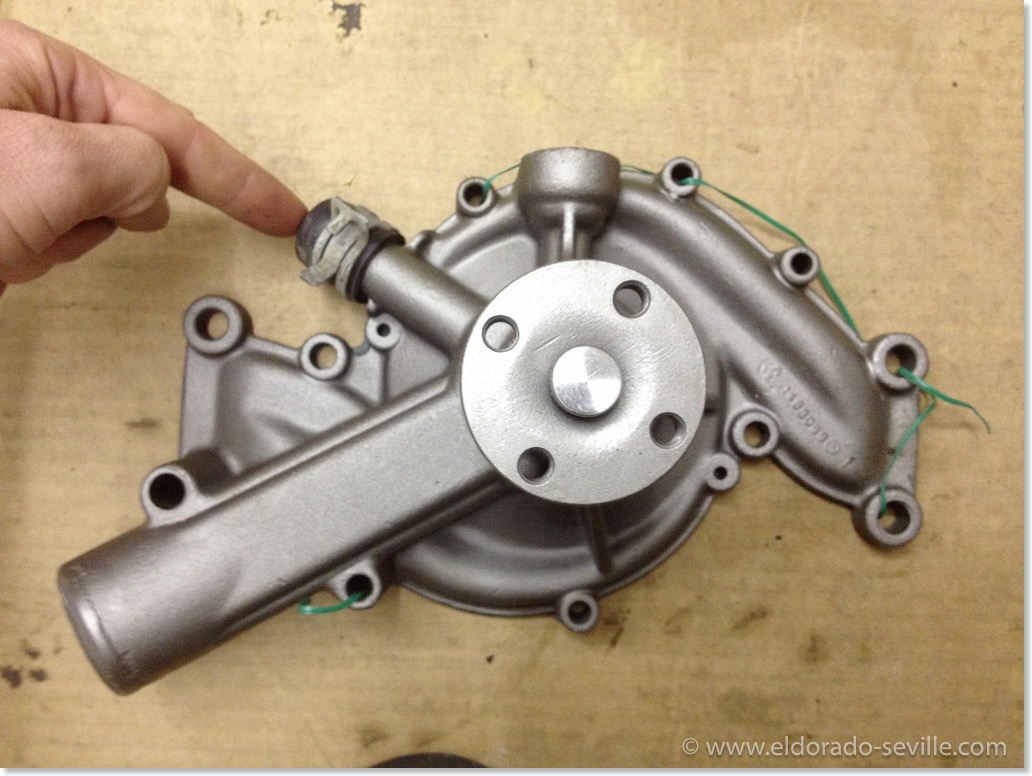
This is the incorrect 1965 water pump everybody is selling for the 429 engines. It will work with the 66 and 67 Cadillacs as well, but it has an additional water outlet which was not used from 1966 on. If you buy them for your 66 or 67 the no longer used outlet is often blocked like you can see on this picture. The correct 1966/67 pumps are much harder to find and way more expensive.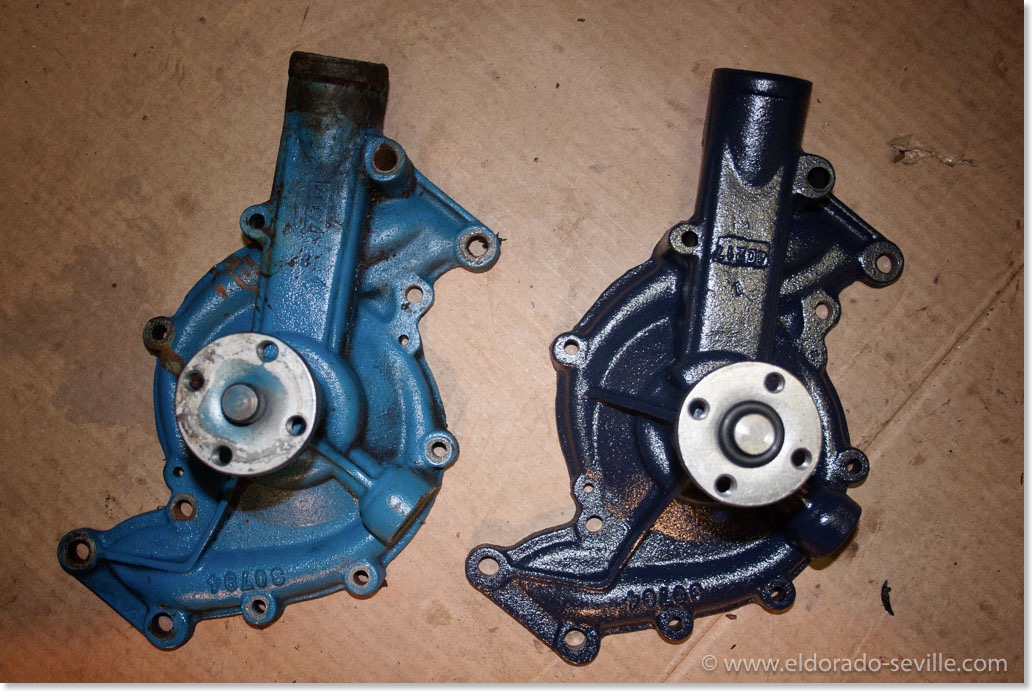
The original water pump on the left and the correct rebuilt 1966/67 Cadillac pump on the right in the correct color.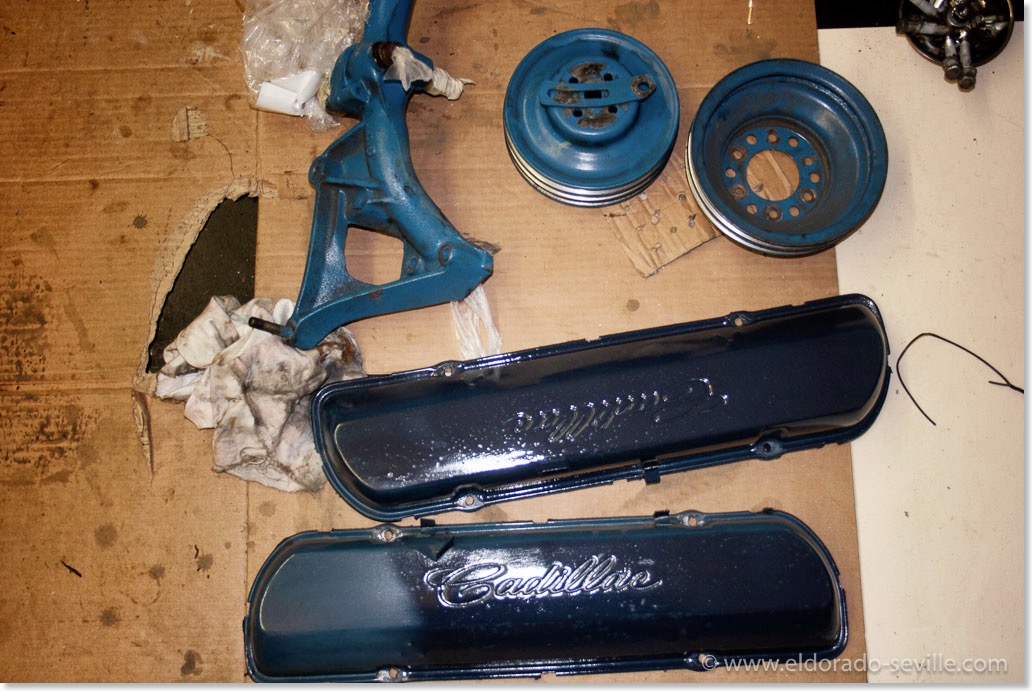
I will sandblast and repaint all this parts soon.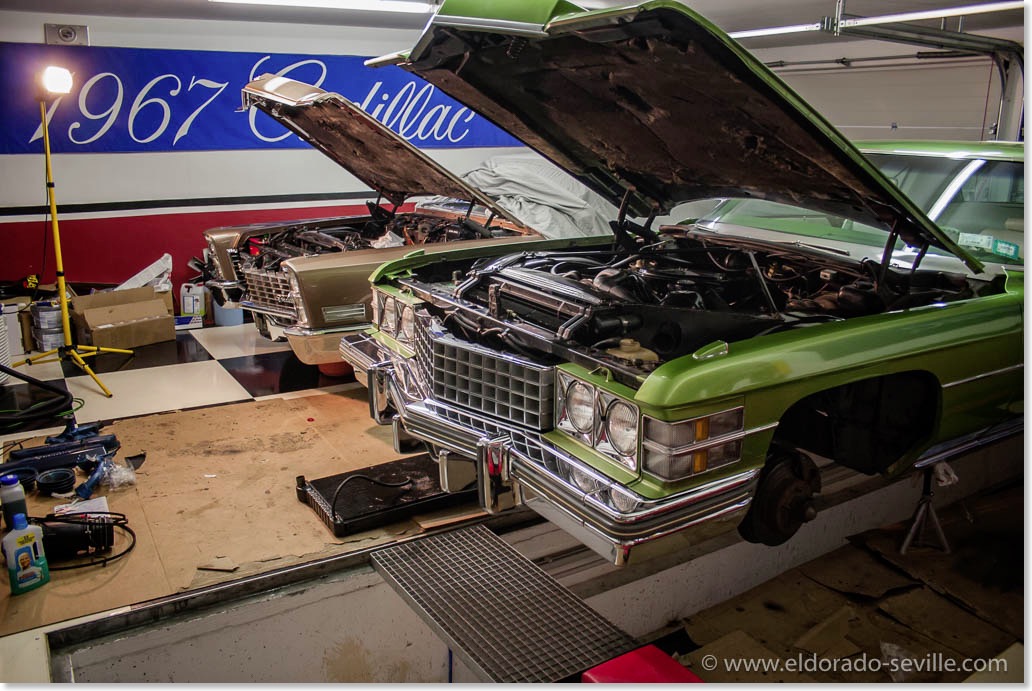
I do have two bigger projects in my garage at the moment and it looks like a mess in there.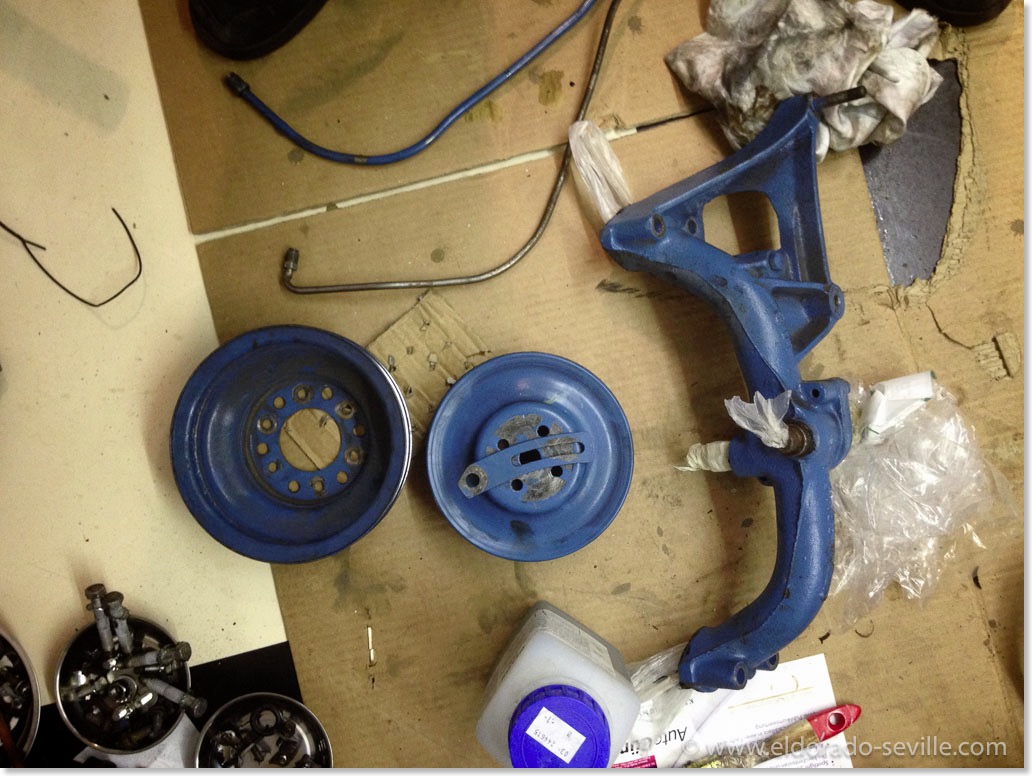
The parts before they were media blasted.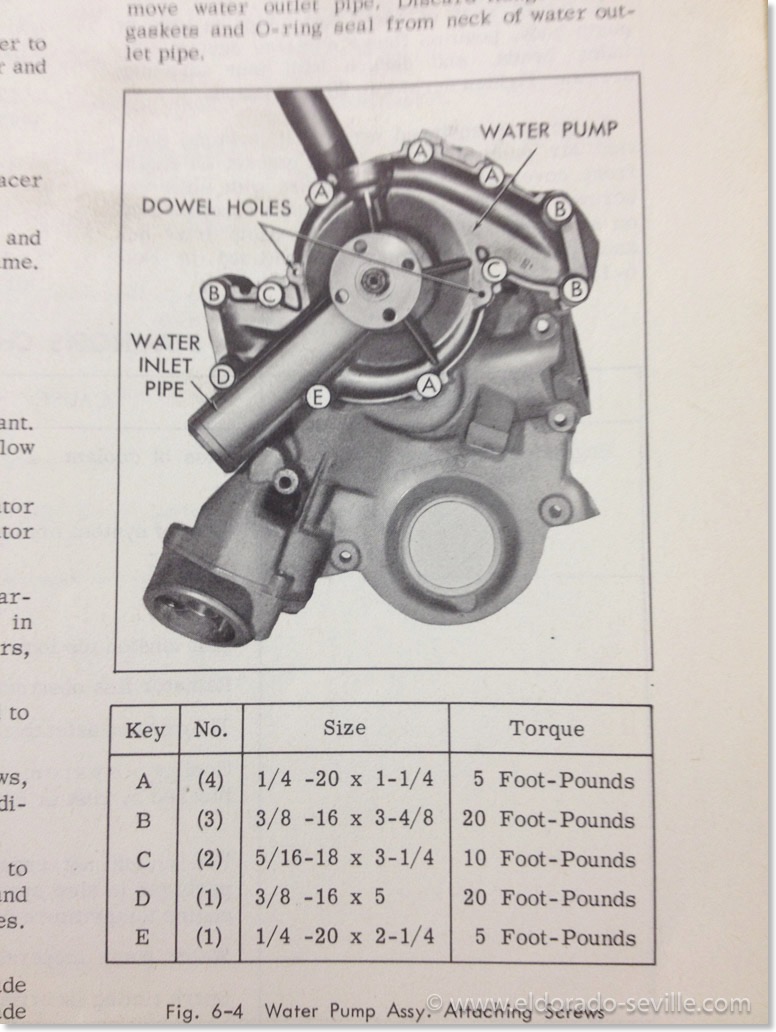
1967 Cadillac Water Pump torque specifications - make sure to follow them EXACTLY!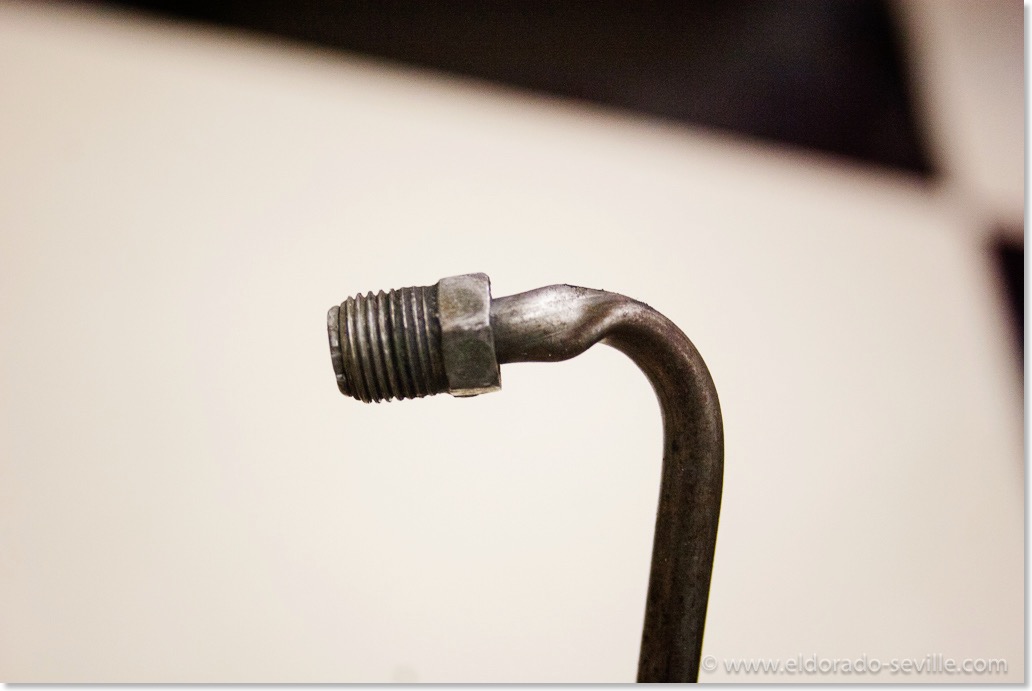
This is how a professional restoration shop damaged the original fuel line when it tightened it 15 years ago during a carburetor rebuild. i think I was lucky that it did not leak and still let fuel through...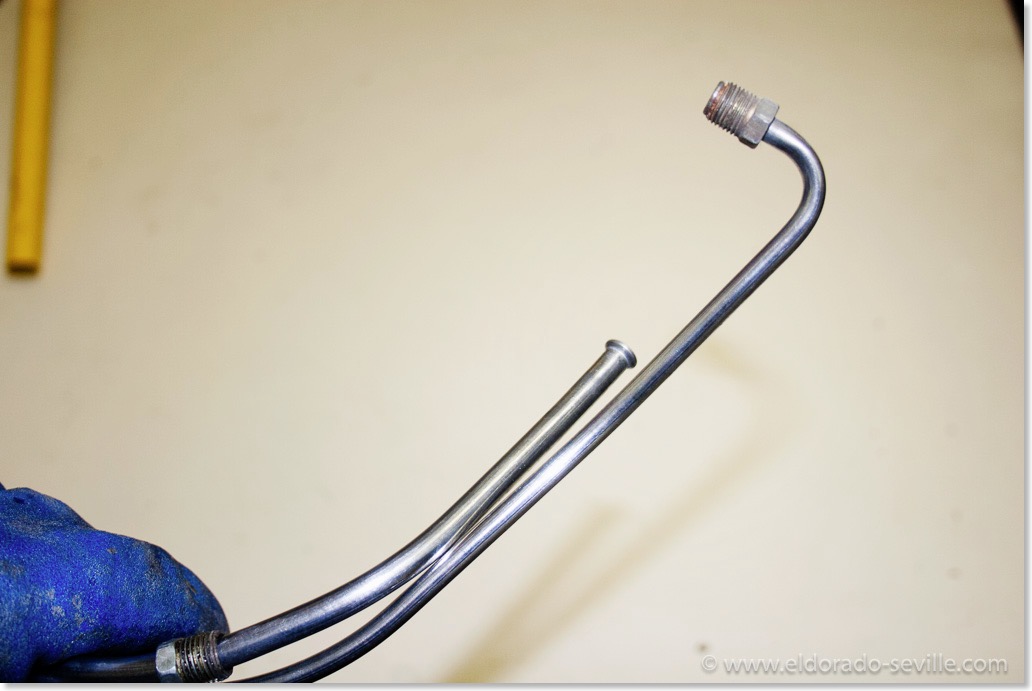
I detailed the fuel lines I have from my spare engine and installed these instead..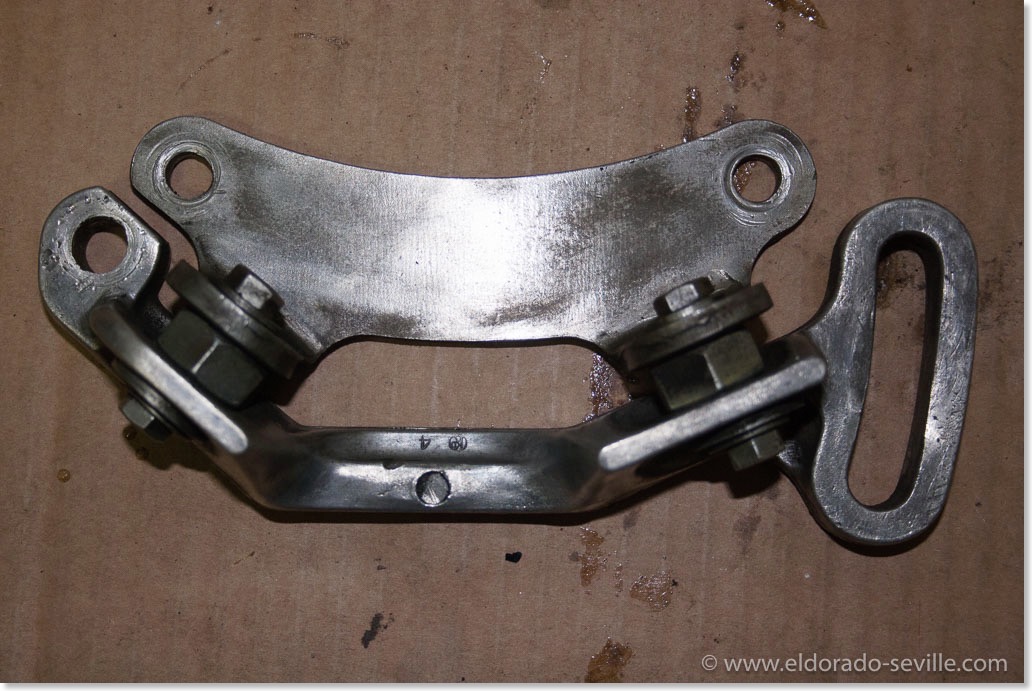
Another construction the restoration shop made for the AC compressor bracket: - instead of rubber bushings they installed this nuts, bolts and washer construction ...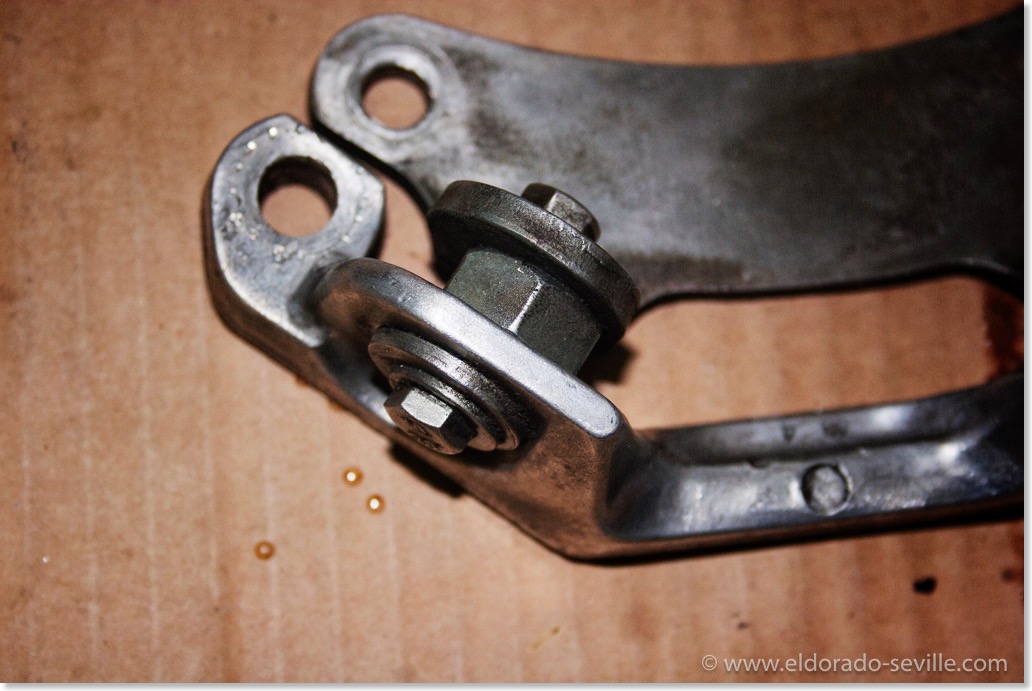
Another construction the restoration shop made for the AC compressor bracket: - instead of rubber bushings they installed this nuts, bolts and washer construction ...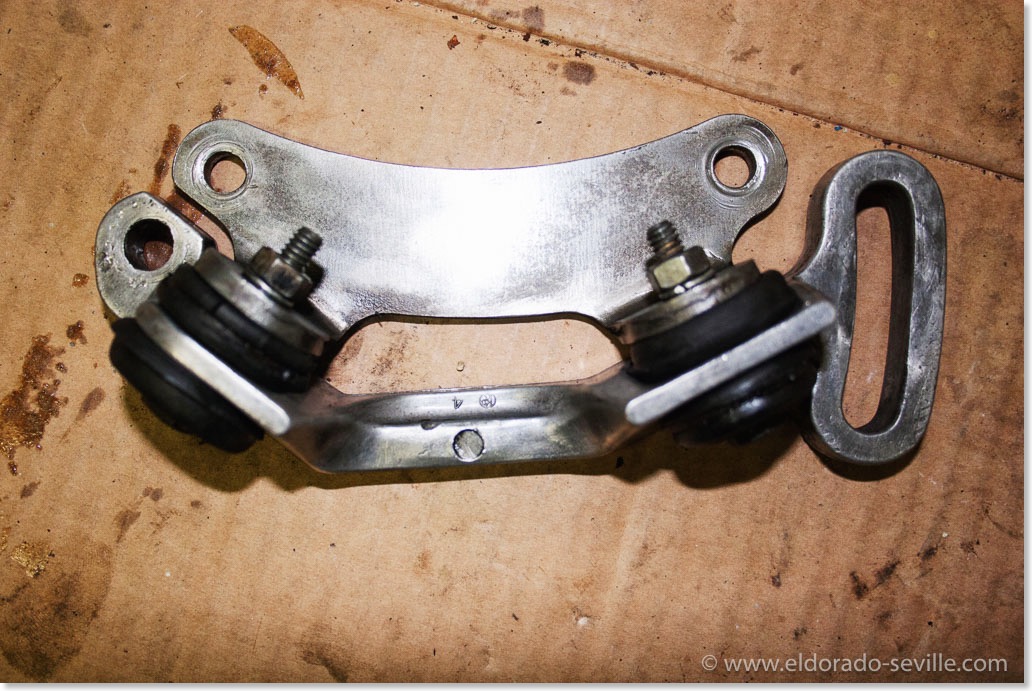
I changed it back to original with the correct bolts and rubber bushings which I soaked in silicone lubricant for a couple of hours to make them soft again...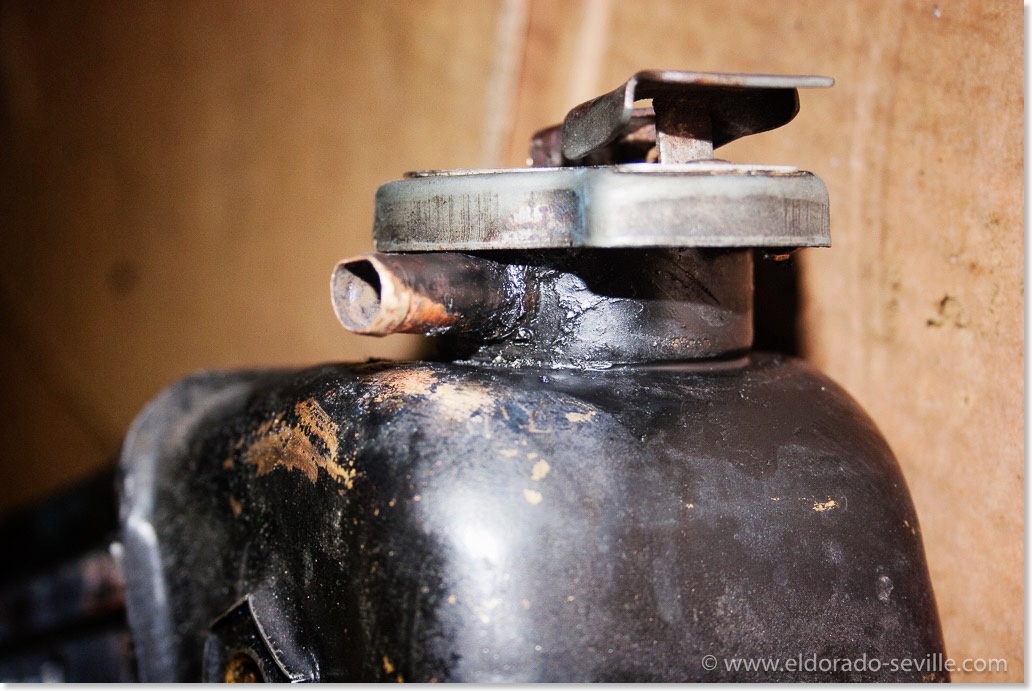
When I removed the overflow hose from the radiator the neck came loose. Luckily I found an older gentleman locally, who could brace it back together the old school way. I will of course detail the radiator as well before installing it back into the car.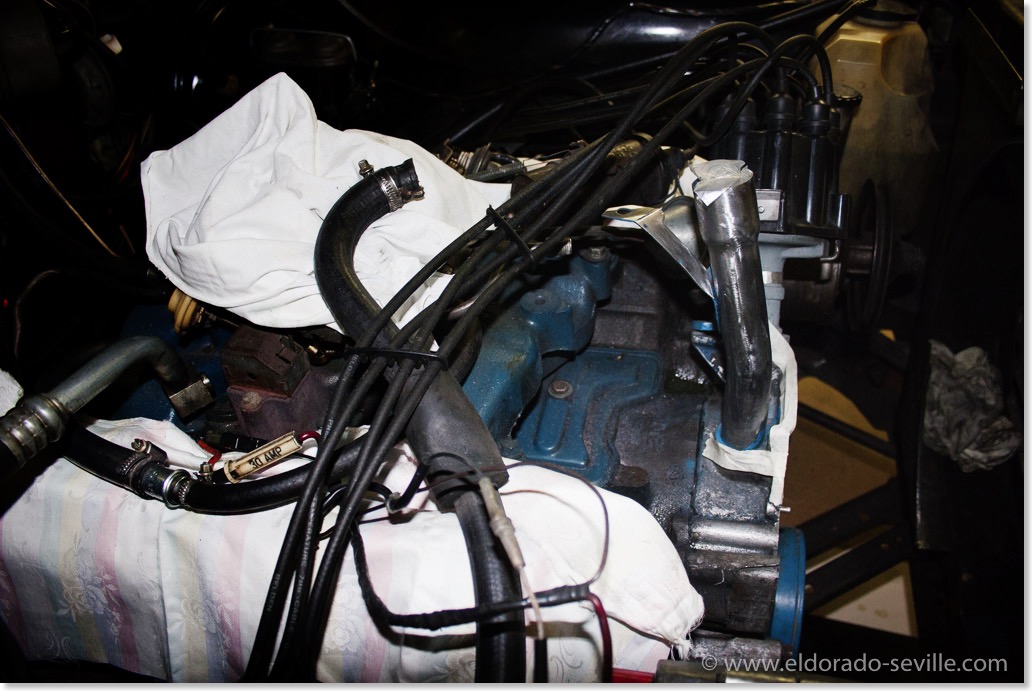
I did not want to remove the front cover so I had to repaint the oil filler tube inside the car... First I brought it back to bare metal.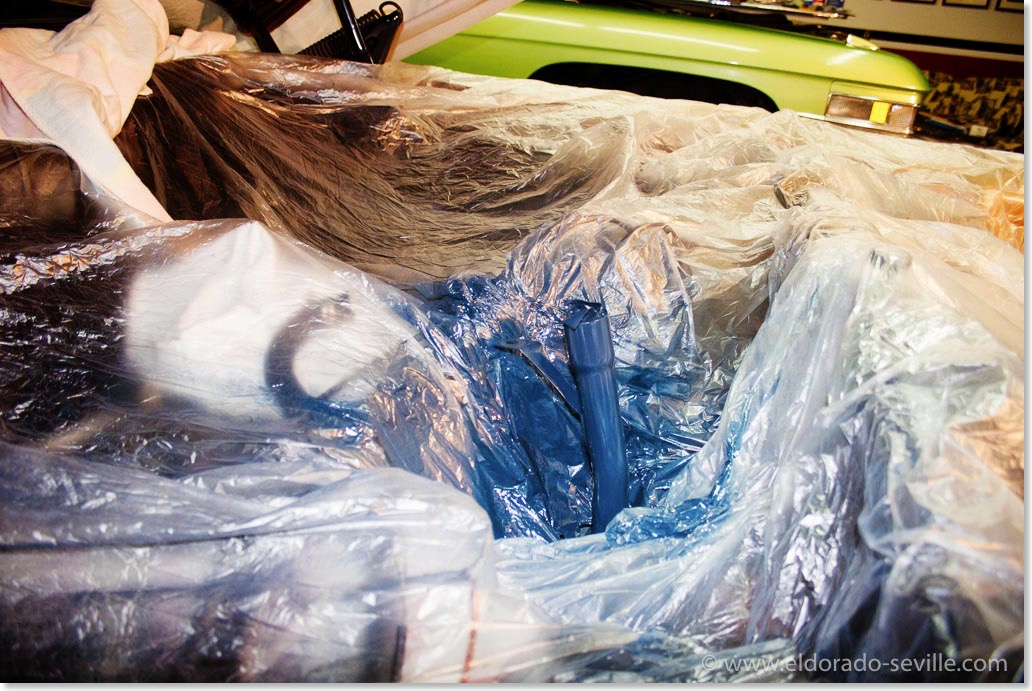
Oil filler tube - painted in the correct shade of Cadillac Engine Blue.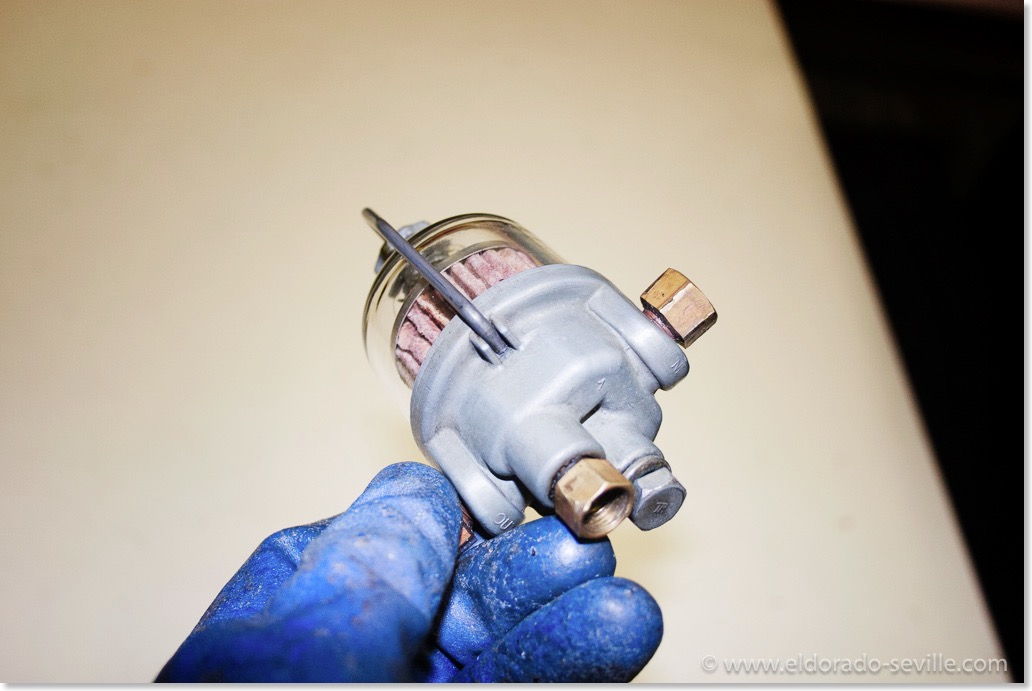
I detailed everything I removed from the car.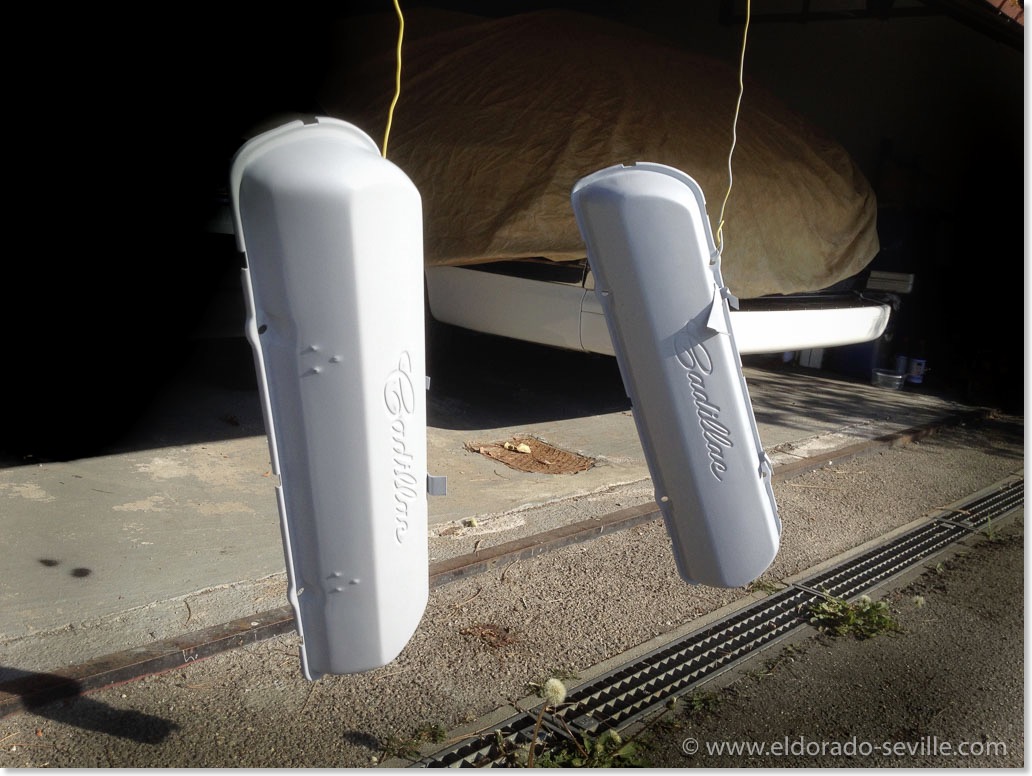
I primered and fillered the valve covers and sanded them to perfection before painting.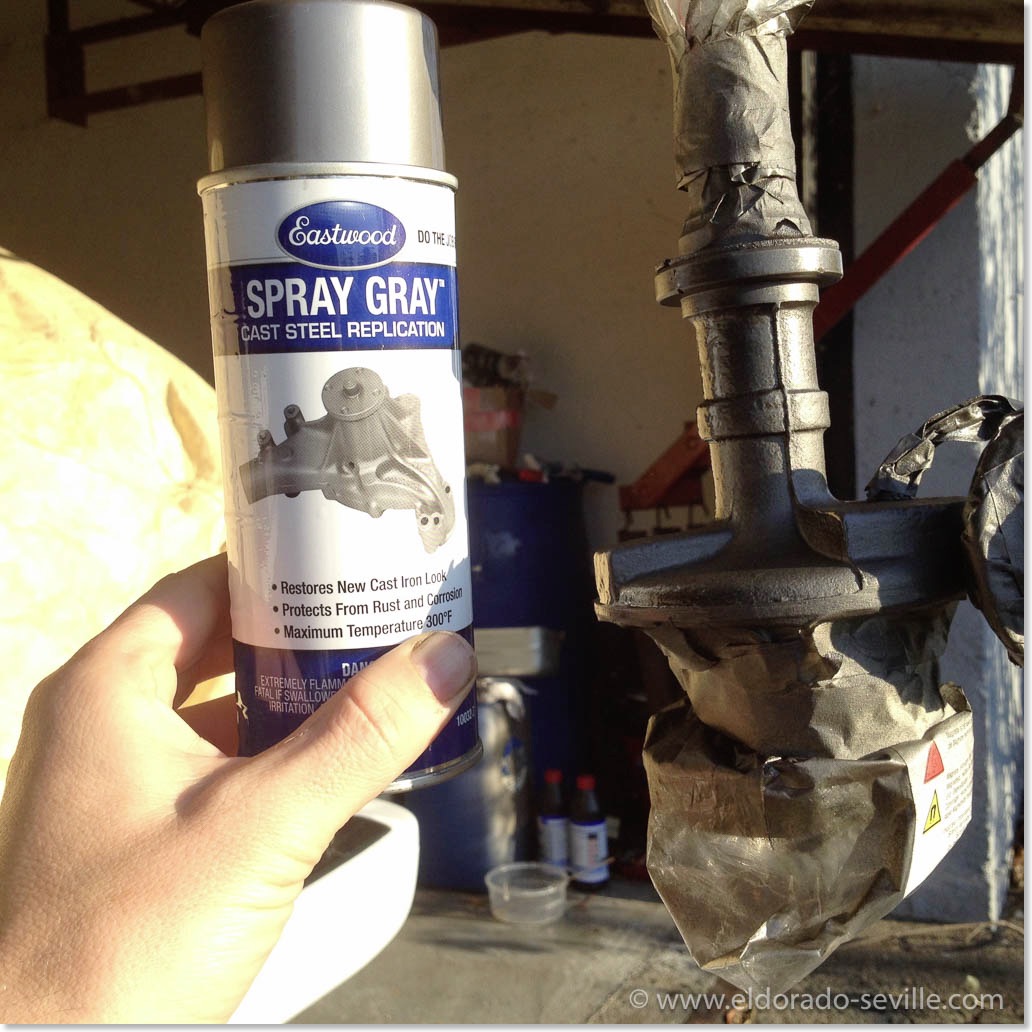
The distributor after painting. This spray gray paint from Eastwood replicates cast steel very very well. I tricked a lot of people with this paint who insisted that it must be bare metal.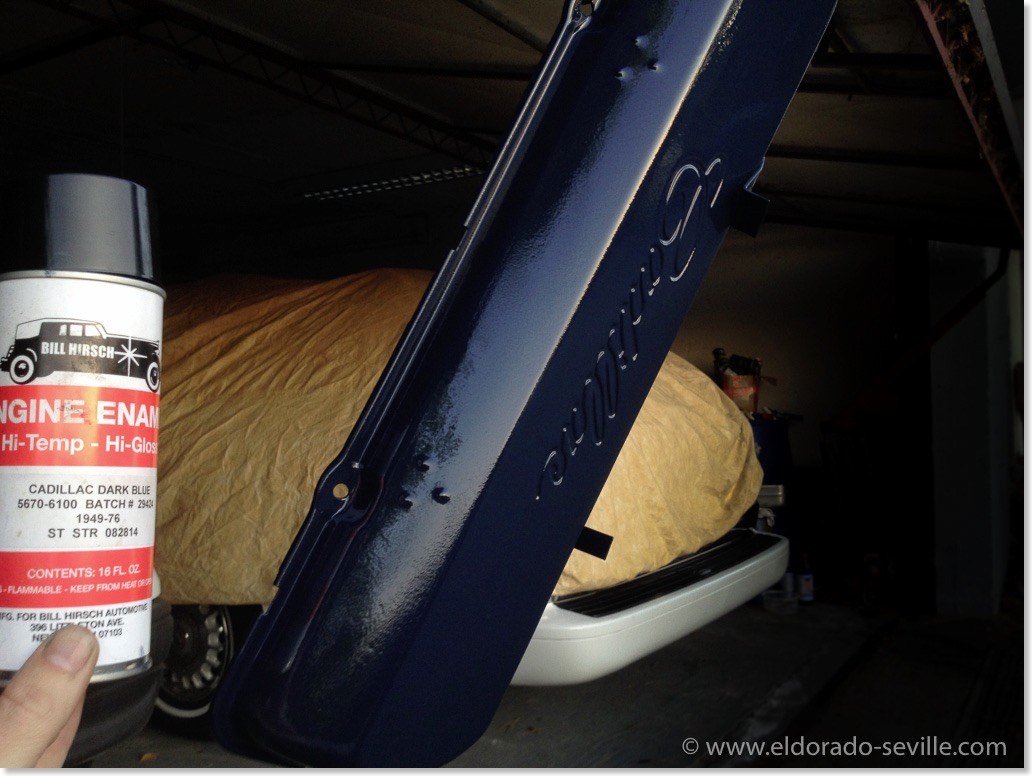
I used Bill Hirsch engine enamel to paint all the engine parts.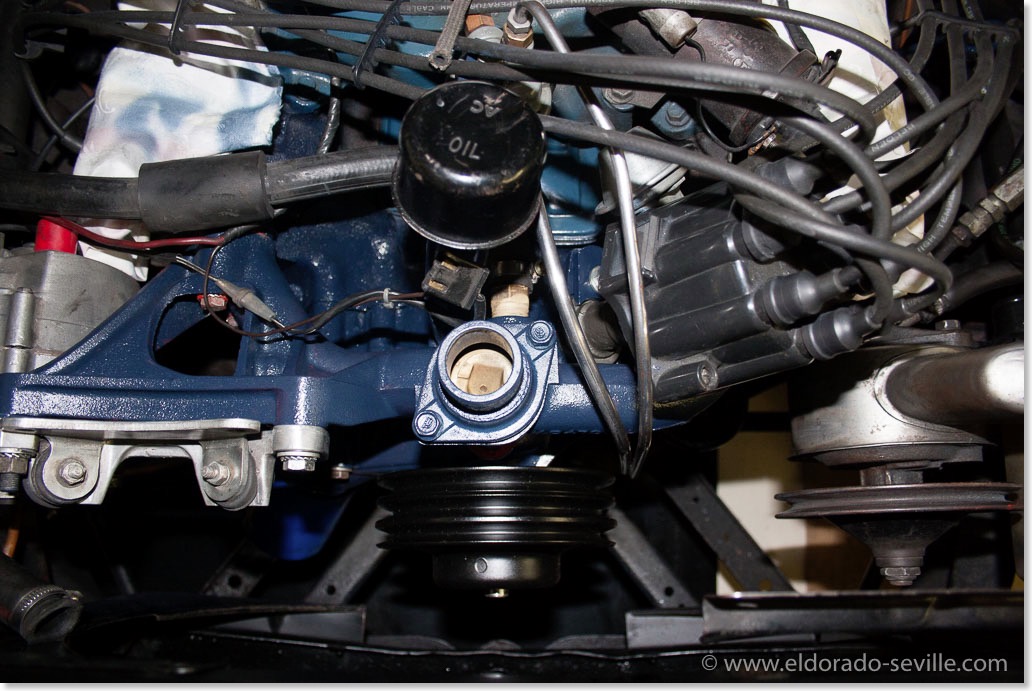
The new water pump and the mediablasted and then repainted parts back in the car. Also painted the water pump pulley in the correct color now (black).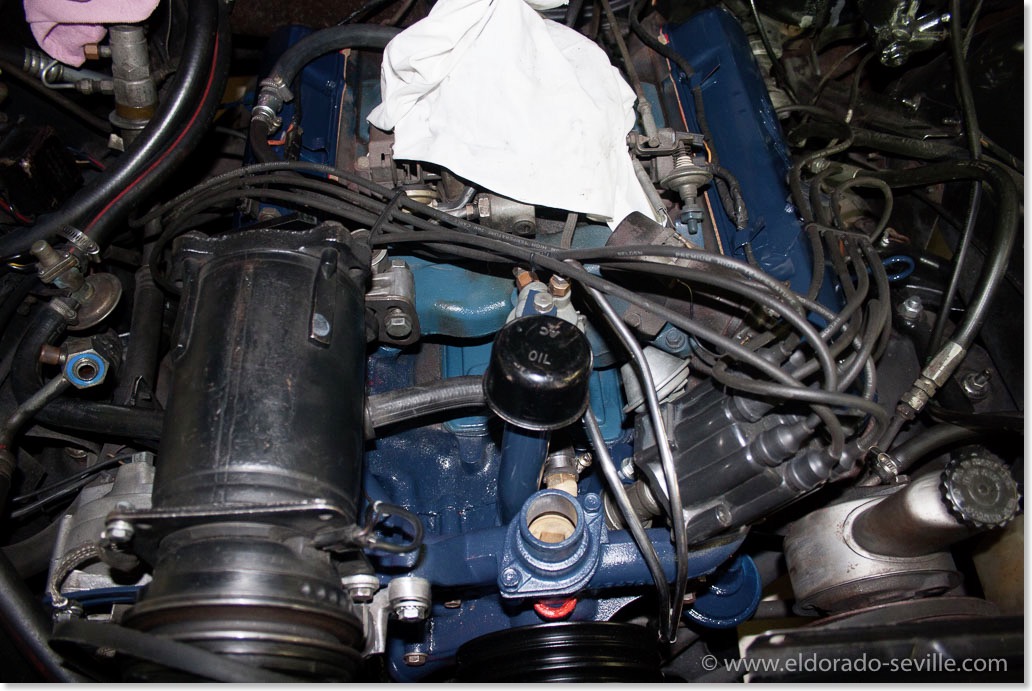
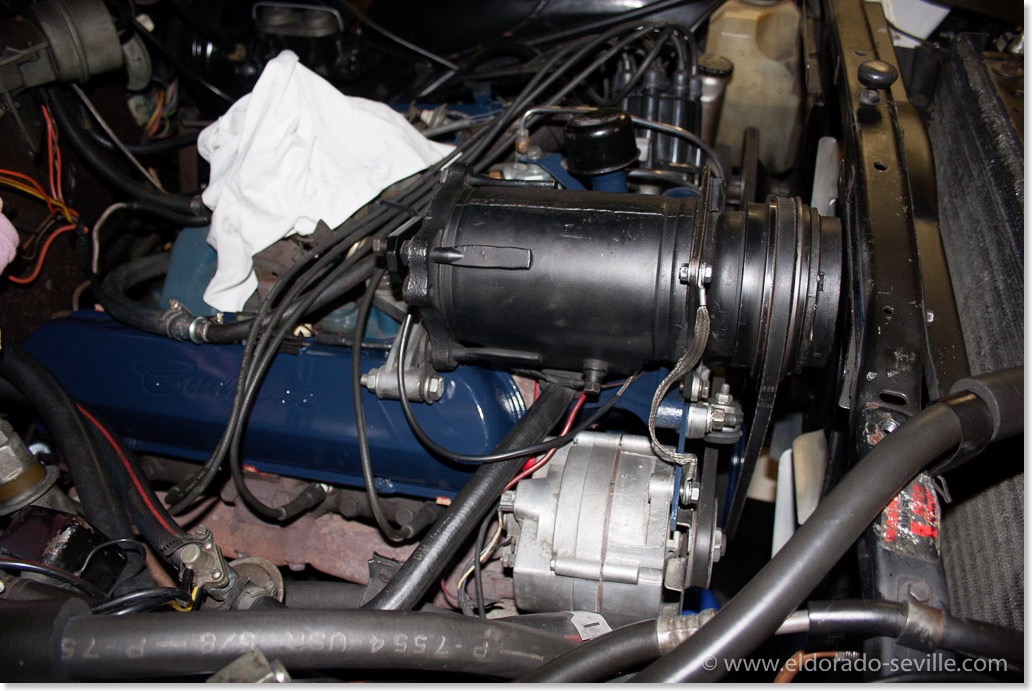
Most things are back together. I am still waiting for the correct reproduction radiator hoses to arrive. I did not repaint the intake manifold in the correct color as I did not have the necessary gaskets to reinstall it. I will do this eventually later, in the case that I have to remove the carburetor...
1966 Cadillac Coupe deVille (16)
1967 Cadillac DeVille (54)
1967 Cadillac Eldorado (73)
1971 Lincoln Continental Mark III (24)
1974 Cadillac Coupe deVille (46)
1978 Cadillac Eldorado Biarritz (25)
1996 Buick Roadmaster (20)
Cadillac BIG Meet (2)
Car Shows (55)
Cruising (4)
CT6 (1)
For Sale (3)
Garage Stuff (32)
Pacer (1)
Restoration (140)
Various (55)
Video (20)
Website News (31)
- 6 way power seat
- 8-track
- 10 Ohm
- 429
- 1932
- 1957
- 1958
- 1958 Cadillac Eldorado Seville
- 1958 Cadillac Repair Tip
- 1959 Cadillac Eldorado Seville
- 1964
- 1965
- 1966
- 1966 Cadillac Coupe deVille
- 1966 Cadillac Repair Tips
- 1967
- 1967 Cadillac DeVille
- 1967 Cadillac Eldorado Repair Tip
- 1967 Cadillac Repair Tip
- 1967 Eldorado
- 1968
- 1970 Cadillac Eldorado
- 1971
- 1971 Lincoln Continental Mark III
- 1974
- 1974 Cadillac Coupe DeVille
- 1974 Cadillac Repair Tip
- 1976
- 1977
- 1978
- 1978 Cadillac Eldorado Biarritz
- 1978 Cadillac Repair Tip
- 1980 Cadillac Eldorado Biarritz
- 1996
- 2012
- 2014
- 2017
- 2018
- 2019
- 2022
- 2023
- 2025
- 3063206
- 7027235
- 7800483
- 7805675
- 7805676
- 12355706
- 17058531
- 17059968
- 17059969
- 22010515
- 22010661
- A.I.R
- A6
- AC
- AC Compressor
- AC Electrical Diagram
- ACC
- Accelerator Pump
- Accelorator pump
- Accident
- Actuators
- Adriatic Blue Metallic
- Ads
- Aftermovie
- Air Pump
- Aircondition
- AIRPUMP
- ALC
- Alternator
- AM
- AM-Transmitter
- Antenna
- Anti Rattle Clips
- Antique Gold
- Arizona Vintage Parts
- Arrival
- Article
- ASC
- Ash Tray removal
- ATC
- Atlantis Blue Firemist
- Austria
- Austro Classic
- Autolite SP-459
- Automatic Seat Back Release
- Award
- Banner
- Barn Find
- Battery
- Battery Tray
- Beach Race
- Bearing
- Bendix
- Biarritz
- Bigfoot
- Bill Hirsch Engine Enamel
- Bleeder Screws
- Bleeding
- Blower
- Bodywork
- Bolts
- Book
- Borg
- Brake Booster
- Brake Fluid
- Brake Gray
- Brakes
- Broken Bolt
- Brougham
- Bucket seats
- Buick
- Bumper End
- Bushings
- Cadillac
- Cadillac BIG Meet
- Cadillac BIG Meet
- Cadillac birthday cake
- Cadillac Blue
- Cadillac Color Selections Dealer Book
- Cadillac Coupe deVille
- Cadillac Dealer
- CADILLAC GRAND EUROPEAN
- Cadillac Meeting
- Cadillac Mini Meeting
- Camaro RS
- Caorle
- Car Show
- Carburetor
- Card
- Carpet
- Carter AFB
- Cavalry Twill Vinyl
- CB
- CBM
- CCCD
- Choke
- Christmas
- Citizens Band
- Classic Cadillac Club Deutschland
- Clay Towel
- Cleaning
- Clock
- Clockwork
- Clutch
- Clutch Coil
- Collector
- Colonial Yellow
- Color Coded Springs
- Commercial
- Compound
- Compressor
- Condenser
- Continental Mark III
- Control Head
- Conversion
- Convertible top
- Coolant
- Corona
- Cowl
- Cruise Control
- Cruising
- CT6
- CV Boots
- CV JOINTS
- D6230
- Dash Trim
- Decal Removal
- Decals
- Decoration
- Dehumidifier
- Delco Moraine
- Der Standard
- detailing
- Deville
- Diagnosis Chart
- Diagram
- Dial
- Digital Rotary Drum Clock
- Diner
- Disc Brakes
- Distributor
- Diverter Valve
- Door Jamb Switch
- Door Rubber Conduit
- Dornbirn
- Dot3
- Drive Shaft
- Driving tour
- Drum brakes
- Dry Ice Blasting
- Dry Ice Cleaning
- DVD
- Eastwood
- Eldorado
- Electric Choke Thermostat
- Electrical schematic
- Elvis
- Engine Bay
- Ep
- Epoxy floor
- Europe
- Evaporator
- Exide
- Factory Markings
- Fender Skirt
- Floor
- Flushing
- Flyer
- Foam
- For Sale
- Front AXLE
- Front brakes
- Front bumper filler
- Front Floor
- Front wheel bearing
- Fuel Filter
- Fuel Pump
- Fuel Sending Unit
- Fusible Link
- Garage
- Garage Cabinets
- Gasket
- GE
- Gear indicator
- General Time
- Glove box light
- Grand European
- H4
- Haus of Hot Rod
- Headlight Actuator
- Headlight doors
- Headlights
- Heater Core
- Heater Hose
- Heater Valve
- High Idle
- History
- Holley
- Honest John
- Hood
- Hood Emblem
- Hood Ornament
- Hose Clamp
- Hot Choke
- Hot Water Valve
- HotRod
- How to
- Hödlmayr
- Ignition Diagram
- Illuminated Entry
- John D‘Agostino
- John Foust
- Klassikwelt Bodensee
- Kremsmünster
- LaSalle
- Leather seats
- Light Switch
- Limited
- Lincoln
- Lincoln Mark III Repair Tip
- Low Mileage
- Magazine
- Marilyn Monroe
- Mark III
- Master Cylinder
- Master Switch
- Master Vacuum Switch
- Media Blasting
- Meeting
- Meguiras
- MK II
- Mobile
- Model
- Moldings
- Mom
- Mopar Nationals
- Mostkost Kustom
- Movie
- Munich
- Neon
- NOS
- Oberösterreicher des Tages
- oilchange
- ORF
- Overspray
- Pacer
- Paint
- Paint correction
- Paintjob
- Part Number
- Parts
- Patch Panel
- Perfect Circle
- Permabag
- Persian Lime
- Photo shooting
- Photoshooting
- Pictures
- PinUp
- POA Valve
- Power Antenna
- Power Servo
- Power Vent Windows
- Power Window
- Printed Circuit Board
- Programmer
- Pulley
- Quadrajet
- Quarter Panel
- Quartz Conversion
- R134
- Radiator
- Radio
- Rattle
- Rear brakes
- Rebuild
- Recalibrate
- RediRad
- Reed Switch
- Relais
- Relaunch
- Removing Overspray
- Repaint
- Repair
- Restoration
- RIP
- Roadhouse
- Roadmaster
- Rochester
- Rocker Arm Cover
- Rocker Panel Extension Clips
- Rostio
- Rotary Valve
- Rotterdam
- Rupes
- Rust removal
- Rust removal gel
- Sabre Wheels
- Sand Blasting
- Sandblasting
- Screed
- Season Greetings
- Seasons Greetings
- Seat Back Locks
- Seat Padding
- Seat Transmission
- See through ornament
- Self adjusters
- Self Starter
- Sepp's Garage
- Seville
- Sheetmetal
- Shocks
- shop manual
- short
- Sign
- Solenoid
- Spark Plug Wire Routing
- Speakers
- Special Award
- Speed Bleeder Screws
- Splash Guard
- Starter Diagram
- Starter Motor
- Steering Column
- Storage
- suction throttling valve
- sunroof
- suspension
- Swirl Mark removal
- Switzerland
- T3
- Taillight Cover
- Texan´s Choice Award
- Thermostat
- Tilt and Telescope
- Time capsule
- Tomsclub
- Torque Specifications
- Tower Hose Clamp
- Towtruck
- Trailer
- Transducer
- Transmission
- transmission control selector
- transmission control selector indicator light
- transmission shift indicator
- Treadle Vac
- Treffen
- Tri-Band
- Troubleshooting
- Trunk Cardboard Kit
- Trunk lid
- Trunk lining
- Trunk to bumper cover
- Turn Signal Switch
- TV
- Typisierung
- Ultimate Garage
- Underbody
- Undercarriage
- Undercoating
- Undercoating Removal
- Vacuum Booster
- Vacuum diagram
- Vacuum hoses
- Vacuum Master Switch
- Vacuum Schematic
- Vacuum Valve
- Valve Cover
- Various
- Vent Window Switch
- Vibration
- Vibrator
- Vicodec roof
- Video
- Vinegar
- Vinyl Roof
- Visitor
- Washer Fluid Float
- Washer Fluid Low Level Indicator
- Water Pump
- Wax
- Weatherstripping
- Website News
- Westclox
- Wheel Bearings
- Wheel Housing
- Wiesbaden
- Windlace
- Winter
- Wiring
- Wiring Diagram
- Wonderbar
- Workbench
- Zurzach
 GERALD´S CADILLACS - NEWS